Build Your Own Aquarium Stand: A DIY Guide for Fish Enthusiasts
Anúncios
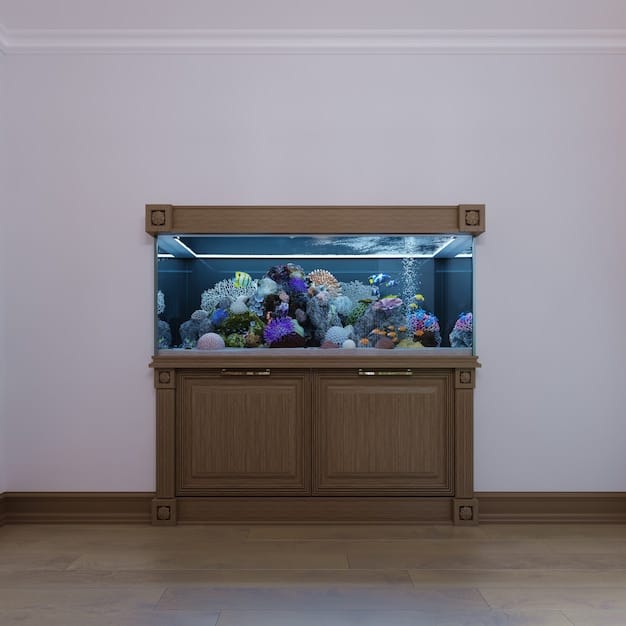
Building a custom aquarium stand is a rewarding DIY project, allowing fish lovers to create a sturdy and aesthetically pleasing base tailored to their tank’s specific needs and dimensions, ensuring both safety and visual appeal.
Are you ready to elevate your aquarium setup? Building a custom aquarium stand not only adds a personal touch to your home but also provides a robust and perfectly sized foundation for your aquatic ecosystem. This step-by-step guide will empower you to build a custom aquarium stand that is both functional and stylish.
Anúncios
Why Build a Custom Aquarium Stand?
Creating your own aquarium stand offers numerous advantages over purchasing a pre-made one. It allows for complete customization to fit your specific tank size, desired aesthetics, and storage needs. Plus, it can be a cost-effective and satisfying DIY project.
Building a custom stand ensures that your aquarium is safely and securely supported, which is crucial for the well-being of your aquatic pets. A poorly constructed stand can lead to disastrous consequences, including tank failure and potential damage to your home.
Anúncios

Benefits of a DIY Aquarium Stand
- Custom Fit: Tailor the stand to the exact dimensions of your aquarium, eliminating unsightly overhangs or gaps.
- Cost Savings: Often, building your own stand is more affordable than purchasing a high-quality, pre-made option.
- Personalization: Choose your preferred materials, finishes, and design elements to match your home décor.
- Added Storage: Incorporate shelves, cabinets, or drawers to store aquarium supplies and equipment.
Ultimately, building a custom aquarium stand is about creating a harmonious blend of functionality and aesthetics, ensuring a safe and beautiful home for your aquatic friends.
Planning Your Aquarium Stand
Before you even pick up a saw, careful planning is essential. This stage involves determining the dimensions of your stand, selecting the appropriate materials, and creating a detailed design. This will ensure a smooth and successful building process.
Consider the weight of your filled aquarium. Water is heavy, and the stand must be strong enough to support the weight of the tank, substrate, decorations, and water without any signs of stress or instability.
Determining Dimensions
Measure your aquarium carefully, taking into account any external filters or equipment that might need space. The stand should be slightly larger than the base of the aquarium to provide a stable and even support.
Material Selection
Wood is a popular choice for aquarium stands, offering both strength and aesthetic appeal. Plywood, dimensional lumber (like 2x4s), and hardwoods (like oak or maple) are all viable options. Consider using water-resistant materials or applying a waterproof sealant to protect against spills and moisture.
Design Considerations
Sketch out your design, including the dimensions, materials, and any additional features like doors, shelves, or cable management. Consider the overall style of your home and choose a design that complements your existing décor.
With a solid plan in place, you’re well-prepared to move on to the construction phase with confidence and precision.
Tools and Materials You’ll Need
Having the right tools and materials on hand will make the building process much smoother and more efficient. This section outlines the essential items you’ll need to construct your custom aquarium stand.
Gather all of your tools and materials before you begin working. This will save you time and prevent frustration during the construction process.
Essential Tools
- Circular Saw: For cutting large pieces of wood.
- Power Drill: For drilling pilot holes and driving screws.
- Measuring Tape: For accurate measurements.
- Level: To ensure the stand is perfectly level.
- Safety Glasses: To protect your eyes from debris.
- Wood Screws: For assembling the frame.
- Clamps: To hold pieces together while the glue dries.
Materials List
The specific materials you’ll need will depend on your chosen design, but here’s a general list:
- Plywood or lumber for the frame
- Wood screws
- Wood glue
- Sandpaper
- Primer and paint or stain
- Waterproof sealant (optional)
- Hardware for doors or drawers (optional)
Ensuring you have all the necessary tools and materials readily available will set you up for a successful and enjoyable aquarium stand build.
Step-by-Step Construction Guide
Now, let’s get to the hands-on part! This section provides a detailed, step-by-step guide to constructing your custom aquarium stand. Follow these instructions carefully for a sturdy and aesthetically pleasing result.
Remember, safety is paramount. Always wear safety glasses and use caution when operating power tools.
Building the Frame
- Cut the lumber to the required dimensions for the frame.
- Assemble the frame using wood screws and wood glue, ensuring that all corners are square.
- Reinforce the corners with metal brackets for added stability.
Adding the Top and Bottom
- Cut the plywood to the size of the top and bottom of the stand.
- Attach the plywood to the frame using wood screws and wood glue.
- Ensure that the top is perfectly level and that the bottom is flush with the frame.
Finishing Touches
- Sand the entire stand to create a smooth surface.
- Apply primer and paint or stain to your desired color.
- Add a waterproof sealant to protect against spills and moisture.
- Install any hardware for doors or drawers.
By following these steps meticulously, you’ll have a solid and attractive aquarium stand ready to support your aquatic haven.
Ensuring Stability and Safety
The stability and safety of your aquarium stand are non-negotiable. This section focuses on the critical steps you need to take to ensure that your stand can safely support the weight of your aquarium and prevent any accidents.
Take your time and double-check all measurements and connections. A little extra effort now can save you a lot of trouble (and potential disaster) later.
Weight Distribution
Ensure that the weight of the aquarium is evenly distributed across the stand. Use shims to level the stand if necessary, and avoid placing heavy objects on one side of the aquarium.
Reinforcements
Add extra supports to the frame if you’re building a stand for a large or heavy aquarium. Consider using thicker lumber or adding additional crossbeams to the frame.
Testing the Stand
Before placing your aquarium on the stand, test its stability by placing weights on it. Gradually increase the weight to simulate the filled aquarium and check for any signs of stress or instability.
By prioritizing stability and safety, you can rest assured that your aquarium is in good hands—or rather, on a solid stand.
Customizing Your Aquarium Stand
One of the best parts of building your own aquarium stand is the ability to customize it to your exact liking. This section explores creative ways to personalize your stand to match your style and meet your specific needs.
Don’t be afraid to experiment with different materials, finishes, and design elements. Let your creativity shine and create a truly unique aquarium stand.
Adding Doors and Drawers
Incorporate doors and drawers to create storage space for aquarium supplies, food, and equipment. Choose hardware that complements your chosen style and adds a touch of elegance to the stand.
Cable Management
Design a cable management system to keep cords and wires organized and out of sight. Use cable clips, grommets, or a dedicated compartment to neatly route the cables from your aquarium equipment.
Lighting
Add integrated lighting to illuminate the stand and create a stunning visual display. Consider installing LED strip lights or spotlights to highlight the aquarium and its surroundings.
By incorporating these customization ideas, you can transform your aquarium stand into a functional and eye-catching centerpiece in your home.
| Key Point | Brief Description |
|---|---|
| 📏 Custom Dimensions | Tailor the stand to perfectly fit your aquarium’s size. |
| 💪 Sturdy Build | Ensure the stand can safely support the weight of a filled aquarium. |
| 🧰 Organized Storage | Incorporate storage for aquarium supplies and equipment. |
| 💡 Aesthetic Design | Match the stand to your home’s decor for a cohesive look. |
Frequently Asked Questions
▼
Plywood and dimensional lumber are popular choices due to their strength and affordability. Hardwoods like oak and maple offer enhanced durability and aesthetic appeal.
▼
Use a level to check the stand’s surface. Shims can be used under the legs to correct any imbalances and ensure a perfectly level surface.
▼
Yes, waterproofing is highly recommended. Apply a waterproof sealant to protect the wood from spills and moisture, preventing damage and prolonging the stand’s lifespan.
▼
The weight capacity depends on the materials and construction methods used. A well-built stand using quality lumber can easily support several hundred pounds.
▼
Absolutely! Adding doors and drawers is a great way to incorporate storage space for aquarium supplies and equipment, enhancing the stand’s functionality and aesthetics.
Conclusion
Building a custom aquarium stand is a rewarding endeavor that allows you to create a functional and visually appealing foundation for your aquatic ecosystem. By following this step-by-step guide and prioritizing safety and customization, you can build a stand that perfectly complements your aquarium and enhances your home.


