Build a Chicken Coop from Pallets: A Sustainable Project
Anúncios
Building a chicken coop from pallets is a sustainable and cost-effective DIY project, repurposing readily available materials into a safe and functional home for your chickens, while also promoting eco-friendly practices.
Embarking on a DIY project that benefits both your backyard and the environment? Learning how to build a chicken coop from pallets offers a fantastic solution. This guide will walk you through the process of creating a sustainable and affordable home for your feathered friends.
Anúncios
Why Build a Chicken Coop from Pallets?
Building a chicken coop from pallets isn’t just a fun DIY project; it’s a practical and eco-conscious choice. Discover the numerous advantages of using pallets to create a cozy and secure home for your chickens.
Cost-Effectiveness
Pallets are often free or very low cost, making them a budget-friendly alternative to buying new lumber. This can significantly reduce the overall expense of building a chicken coop.
Anúncios
Sustainability
Repurposing pallets helps reduce waste and gives these discarded materials a new life. By using pallets, you’re contributing to a more sustainable and environmentally friendly approach to chicken keeping.
Customization
Pallets can be easily adapted and customized to fit your specific needs and space requirements. You can design a coop that perfectly suits the number of chickens you plan to keep and the available space in your backyard.
- Reduces landfill waste.
- Offers an affordable housing solution.
- Allows for flexible and unique designs.
Choosing to build with pallets offers economic and environmental benefits, allowing for a highly personalized and sustainable chicken coop design.
Planning Your Pallet Chicken Coop
Before you begin hammering and sawing, careful planning is crucial. Let’s outline the key considerations for designing and preparing to build your pallet chicken coop, ensuring a successful and functional outcome.
Size and Dimensions
Determine the appropriate size of your coop based on the number of chickens you plan to house. A general rule is to provide at least 4 square feet of space per chicken inside the coop and 8-10 square feet per chicken in an outdoor run.
Location
Choose a location that offers good drainage, protection from the elements, and easy access for maintenance and egg collection. Consider sunlight exposure and proximity to predators.
Design Considerations
Sketch out a design that incorporates essential features such as nesting boxes, roosting bars, a secure door, and adequate ventilation. Plan for easy cleaning and accessibility.
Proper planning ensures your pallet chicken coop is not only functional but also provides a safe and comfortable environment for your chickens.
Gathering Materials and Tools
With your design in hand, it’s time to collect the necessary materials and tools. Having everything prepared will streamline the construction process and ensure a smoother build. Read on to learn what you’ll need.
Pallet Selection
Source pallets that are sturdy, untreated, and free from chemical contamination. Look for pallets marked with “HT” (heat treated), which are safe for use. Avoid pallets marked with “MB” (methyl bromide), as this is a toxic fumigant.
Additional Lumber
You may need additional lumber for framing, roofing, and creating specific components of your coop. Consider using reclaimed wood or sustainably sourced lumber to further enhance the eco-friendliness of your project.
Essential Tools
Gather the necessary tools, including a hammer, saw, drill, screws, nails, measuring tape, level, and safety glasses. Having the right tools will make the construction process much easier and safer.
- Hammer
- Saw (circular or hand saw)
- Drill with various drill bits
- Screws and nails
Collecting high-quality pallets and ensuring you have the necessary tools will set you up for a successful chicken coop build.
Step-by-Step Construction Guide
Now it’s time for the hands-on part: building your chicken coop. This step-by-step guide breaks down the process into manageable stages. Follow along for a straightforward construction experience.
Preparing the Pallets
Clean the pallets thoroughly and remove any loose nails or staples. Disassemble the pallets as needed to obtain individual boards for specific parts of the coop.
Building the Frame
Construct the base frame of the coop using sturdy pallets or lumber. Ensure the frame is level and square for a stable foundation.
Adding the Walls
Attach pallet boards to the frame to create the walls of the coop. Overlap the boards slightly for added strength and weather protection.
Step-by-step instructions ensure the solid frame and well-built walls of your new coop are a safe haven for your chickens.
Roofing and Weatherproofing and Ventilation
Protecting your chickens from the elements is crucial. The roof and proper ventilation are key to keeping your coop functional, healthy, and safe. Let’s explore how to efficiently achieve this.
Constructing the Roof
Build a solid roof using pallet boards, plywood, or metal roofing sheets. Ensure the roof is angled to allow for proper water runoff. Overhangs can provide additional protection from rain and sun.
Weatherproofing
Seal any gaps or cracks in the walls and roof with caulk or weatherstripping. This will help keep the coop dry and prevent drafts. Consider painting or staining the exterior of the coop with a weather-resistant finish.
Creating Ventilation
Ensure adequate ventilation by adding vents near the top of the walls. Cover the vents with hardware cloth to prevent predators from entering. Good ventilation helps maintain air quality and prevents moisture buildup inside the coop.

A good roof keeps the coop watertight, while proper ventilation maintains a healthy, enjoyable environment.
Adding the Finishing Touches
With the main structure complete, it’s time to add the features that will make your chicken coop functional and comfortable for its inhabitants. Explore the final steps to enhance your coop.
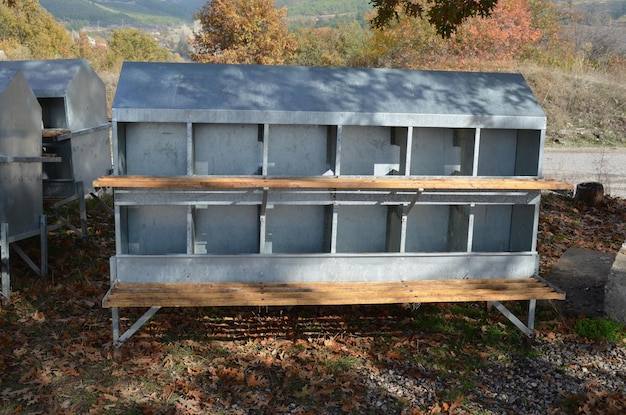
Installing Nesting Boxes
Build or install nesting boxes inside the coop, providing one nesting box for every 3-4 hens. Line the nesting boxes with straw or wood shavings to create a comfortable laying environment.
Adding Roosting Bars
Install roosting bars at varying heights to allow chickens to roost comfortably. Use sturdy branches or wooden dowels for the roosting bars.
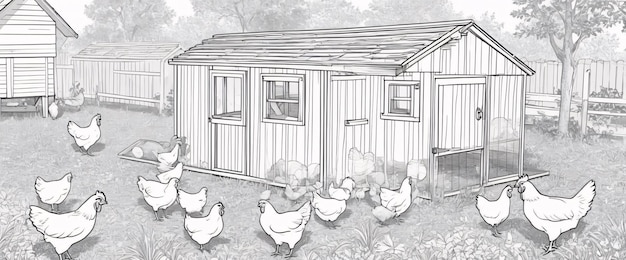
Creating an Outdoor Run
Construct an enclosed outdoor run adjacent to the coop, providing additional space for chickens to roam and forage. Use hardware cloth to create secure walls and a roof for the run.
- Comfortable roosting bars.
- Secure outdoor run.
- Accessible door.
With a safe location for egg-laying, roosting and exploring the backyard, a completed chicken coop becomes a comfortable home.
Maintaining Your Pallet Chicken Coop
Regular maintenance will keep your chicken coop in good condition, while assisting your chickens stay healthy; here are a few ideas.
Regular Cleaning
Clean the coop regularly by removing soiled bedding and droppings. This will help prevent the buildup of harmful bacteria and parasites.
Pest Control
Implement pest control measures to prevent infestations of mites, lice, and other pests. Use natural remedies such as diatomaceous earth or consult with a veterinarian for appropriate treatments.
Inspections
Inspect the coop regularly for any signs of damage or wear. Repair any issues promptly to maintain the coop’s structural integrity and prevent potential hazards.
| Key Point | Brief Description |
|---|---|
| 🐔 Pallet Selection | Using untreated and sturdy pallets marked “HT” is important for safety. |
| 📏 Size Planning | Provide at least 4 sq ft per chicken inside the coop and 8-10 sq ft in the run. |
| 🛡 Weatherproofing | Seal cracks and ensure a solid roof for water runoff. |
| 🌬 Ventilation | Ensuring good air flow keeps coop dry and avoids moisture buildup. |
Frequently Asked Questions
▼
Use heat-treated pallets marked with “HT” and avoid those treated with chemicals like methyl bromide (“MB”). Make sure they are sturdy and free of splinters.
▼
Provide at least 4 square feet of space inside the coop per chicken and 8-10 square feet in an outdoor run to keep them comfortable and healthy.
▼
Use hardware cloth for walls and roofs. Ensure all doors and windows are securely latched each night, and consider burying the perimeter to prevent digging predators.
▼
Yes, proper ventilation is essential to prevent moisture buildup and maintain fresh air, keeping your chickens healthy. Just be sure to cover the vents with hardware cloth!
▼
Clean the coop at least once a week by removing soiled bedding and droppings to prevent the buildup of pathogens and pests, thus ensuring a healthier environment.
Conclusion
Building a chicken coop from pallets is an achievable and rewarding DIY project that benefits both your chickens and the environment. By following the steps outlined in this guide, you can create a sustainable, affordable, and functional home for your flock, while contributing to a greener planet.


