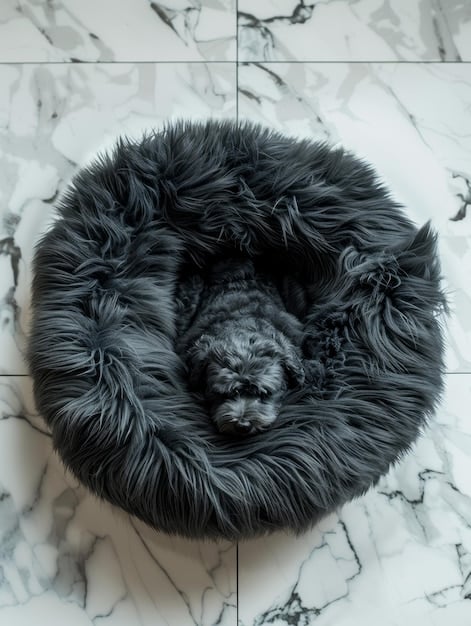
DIY Dog Bed Upgrade: Cozy Retreat in 3 Hours
Anúncios
Transform your old clothes into a comfortable and eco-friendly DIY dog bed in just 3 hours, providing your furry friend with a cozy and personalized retreat.
Looking for a fun and eco-friendly project? This DIY dog bed upgrade: turn old clothes into a cozy retreat in 3 hours is the perfect solution. Give your beloved pet a comfortable and personalized space while repurposing unwanted items.
Anúncios
Why Choose a DIY Dog Bed?
Creating a dog bed yourself is not only a cost-effective solution but also a chance to personalize your pet’s space. With a few simple steps, you can transform old clothes into a comfy and sustainable resting place for your furry friend. It’s a win-win situation!
Making your own dog bed lets you tailor it to your dog’s specific needs and preferences. From size to fabric, you have complete control over the design. Plus, you get to reduce waste by repurposing items you already have at home.
Anúncios
Cost-Effectiveness
Buying a new dog bed can be expensive. Making one from old clothes significantly reduces the cost. You’re using materials you already own, saving you money on pet supplies.
Personalization
A DIY dog bed allows you to choose the fabrics and colors that match your home decor and your dog’s personality. Add special touches to make it unique and comfortable for your pet.
- 🐶 Reduces waste and promotes sustainability.
- 🛏️ Tailored to your dog’s size and comfort preferences.
- 🎨 Customizable to match your home decor.
- 💰 Saves money compared to buying a new bed.
Ultimately, choosing a DIY dog bed offers a blend of practicality, personalization, and environmental responsibility. It’s a creative way to care for your pet while contributing to a more sustainable lifestyle.
Materials You’ll Need
Before you start, gather all the materials you’ll need. Having everything on hand will make the process smoother and more efficient. This project requires minimal supplies, making it accessible to everyone.
Here’s a list of the essentials for your DIY dog bed upgrade: turn old clothes into a cozy retreat in 3 hours. Make sure you have enough material to create a comfortable and supportive bed for your dog.
Gathering Old Clothes
Collect old t-shirts, sweaters, jeans, and any other fabric items you no longer use. The more varied the textures, the cozier the bed will be.
Additional Supplies
You’ll also need some basic sewing supplies. A sewing machine will speed up the process, but you can also sew by hand if needed.
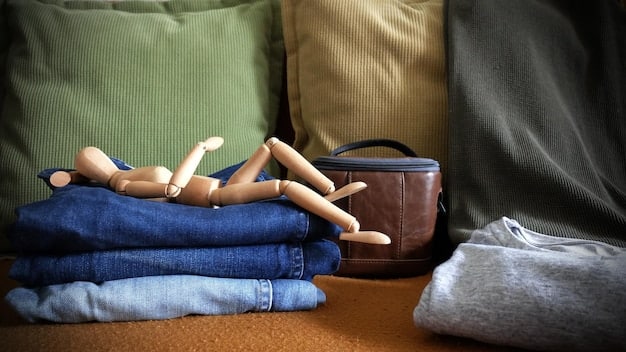
- 🧵 Old clothes: T-shirts, sweaters, jeans, etc.
- 🪡 Sewing machine or needle and thread.
- ✂️ Scissors.
- 📏 Measuring tape.
With the right materials, you’re all set to start creating a comfortable and personalized dog bed. This project is a great way to give new life to your old clothes while providing your pet with a cozy space.
Step-by-Step Guide
Now that you have all your materials, let’s get started with the step-by-step guide. Follow these instructions carefully to create a comfortable and durable dog bed.
Each step is designed to be simple and easy to follow. Even if you’re a beginner at sewing, you can successfully complete this DIY dog bed upgrade: turn old clothes into a cozy retreat in 3 hours.
Preparing the Clothes
Start by washing and drying all the old clothes. This will ensure they are clean and free of any allergens. It also helps to fluff up the fabric for a softer filling.
Sewing the Bed
Sew the pieces together to form the shape of the bed. Leave an opening to stuff the bed with the remaining clothes. Then, sew the opening shut to complete the bed.
- 🧼 Wash and dry all old clothes.
- 📐 Cut the fabric into appropriate sizes.
- 🧵 Sew the pieces together, leaving an opening.
- 🧸 Stuff the bed with remaining clothes and sew shut.
By following these steps, you’ll create a comfortable and personalized dog bed for your furry friend. Remember to take your time and enjoy the process of repurposing your old clothes into something new.
Customizing Your Dog Bed
One of the best parts of a DIY project is the ability to customize it to your liking. There are many ways to add personal touches to your dog bed, making it unique and special.
Consider your dog’s preferences and needs when customizing. Do they prefer a soft, plush bed or a more supportive one? Tailor the DIY dog bed upgrade: turn old clothes into a cozy retreat in 3 hours to suit their individual comfort.
Adding Extra Comfort
Add extra padding with additional fabric or batting. This will make the bed even more comfortable for your dog. You can also use different types of filling to achieve the desired level of support.
Choosing the Right Size
Measure your dog and create a bed that is the perfect size for them. A bed that is too small will be uncomfortable, while one that is too large may not provide enough support.
- 🐾 Add extra padding for comfort.
- 🎨 Choose fabrics and colors that match your dog’s personality.
- 📏 Create the perfect size bed for your dog.
- 🧼 Make it easy to clean with removable covers.
Customizing your dog bed ensures that it meets your pet’s specific needs and preferences. It’s a great way to show your love and care while creating a functional and stylish accessory for your home.
Tips for Maintaining Your DIY Dog Bed
To ensure your DIY dog bed lasts a long time, proper maintenance is essential. Regular cleaning and care will keep it fresh, comfortable, and free of allergens.
Follow these tips to keep your DIY dog bed upgrade: turn old clothes into a cozy retreat in 3 hours in top condition. A well-maintained bed not only looks better but also provides a healthier sleeping environment for your dog.
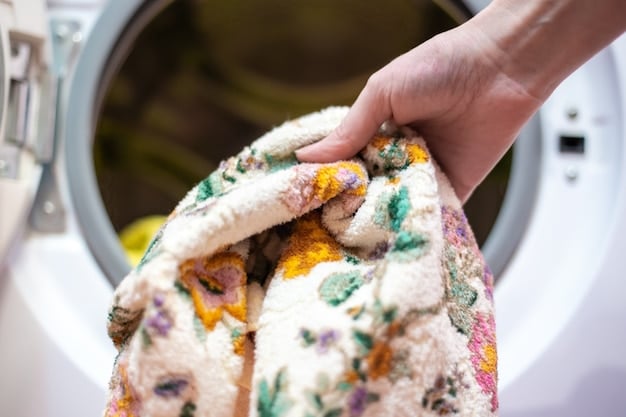
Regular Cleaning
Wash the bed regularly to remove dirt, hair, and odors. A removable cover makes this process much easier. Use a gentle detergent to avoid irritating your dog’s skin.
Spot Cleaning
For small stains and spills, spot clean with a damp cloth and mild soap. This will prevent the need for frequent full washes. Promptly addressing messes keeps the bed fresh.
- 🧺 Wash the bed regularly to remove dirt and odors.
- 🧹 Spot clean small stains and spills promptly.
- ☀️ Air dry the bed to prevent mildew.
- 🔄 Rotate the bed to distribute wear evenly.
By following these maintenance tips, you can extend the life of your DIY dog bed and ensure your furry friend always has a clean and comfortable place to rest. Regular care shows your pet you care about their well-being.
Benefits of a Homemade Dog Bed
Creating a dog bed from scratch offers numerous advantages, both for you and your pet. From cost savings to environmental benefits, a homemade bed can be a superior choice.
Consider the many reasons why a DIY dog bed upgrade: turn old clothes into a cozy retreat in 3 hours is a worthwhile project. It’s not just about saving money; it’s about providing a personalized and sustainable sleeping solution for your dog.
Eco-Friendly
Repurposing old clothes reduces waste and promotes sustainability. By making your own dog bed, you’re contributing to a greener planet. It’s a small change with a big impact.
Cost-Effective
Using materials you already have at home saves money. DIY dog beds are a budget-friendly alternative to expensive store-bought options. You can create a high-quality bed without breaking the bank.
- ♻️ Eco-friendly and sustainable.
- 💰 Cost-effective and budget-friendly.
- 🐾 Personalized and tailored to your dog’s needs.
- 🏡 A fun and rewarding DIY project.
In conclusion, a homemade dog bed offers a combination of environmental, economic, and personal benefits. It’s a practical and meaningful way to care for your pet while contributing to a more sustainable lifestyle.
| Key Point | Brief Description |
|---|---|
| ♻️ Eco-Friendly | Repurposes old clothes, reducing textile waste. |
| 💰 Cost-Effective | Saves money by using materials you already own. |
| 🐾 Personalized | Customizable to fit your dog’s size and preferences. |
| 🧵 DIY Fun | A rewarding and creative activity for pet lovers. |
Frequently Asked Questions
▼
Old t-shirts, sweaters, and jeans are excellent choices. Opt for soft, durable fabrics that will provide comfort and support. Avoid using clothes with zippers or buttons that could pose a hazard.
▼
Ideally, wash the bed every 2-4 weeks, or more frequently if it becomes soiled. A removable cover can simplify the cleaning process. Use a gentle detergent to prevent skin irritation.
▼
A sewing machine will make the process faster and more efficient, but you can definitely sew by hand. Ensure your stitches are strong and secure, especially if your dog is active.
▼
Add extra padding with batting or additional fabric. Consider using a variety of textures to create a cozy and inviting space. A plush blanket can also enhance comfort.
▼
Use hypoallergenic fabrics and detergents. Regularly wash the bed to remove allergens. Consult with your veterinarian for specific recommendations based on your dog’s allergies.
Conclusion
Creating a DIY dog bed upgrade: turn old clothes into a cozy retreat in 3 hours is a rewarding project that benefits both you and your pet. It’s an eco-friendly, cost-effective, and personalized way to provide your furry friend with a comfortable space to rest and relax.


