DIY Dog House Renovation: Winter-Proof for 2025
Anúncios
DIY Dog House Renovation: Insulate and Waterproof Your Dog House for Winter 2025 ensures your furry friend stays warm and dry during the cold months by focusing on applying insulation and waterproofing techniques to provide a safe and comfortable shelter.
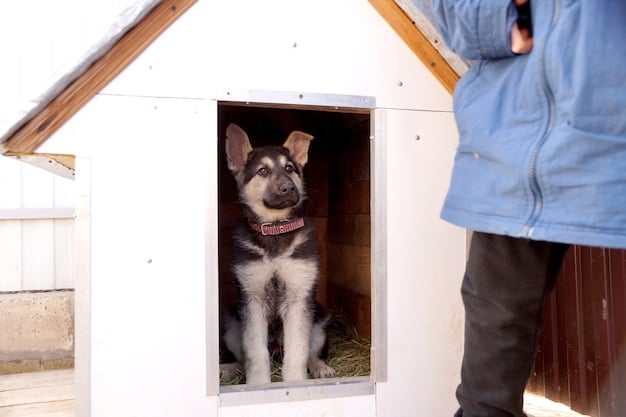
As winter approaches, ensuring your dog’s comfort and warmth is a top priority. A DIY Dog House Renovation: Insulate and Waterproof Your Dog House for Winter 2025 project will transform their existing shelter into a cozy and weatherproof haven, protecting them from the harsh elements.
Anúncios
Why Insulate and Waterproof Your Dog House?
Insulating and waterproofing your dog house are crucial steps in ensuring your pet’s comfort and health during the winter months. Without proper insulation, the dog house can become extremely cold, leading to discomfort and potential health issues for your dog.
Waterproofing prevents rain and snow from seeping into the dog house, which can create a damp and unhealthy environment. A dry, insulated dog house provides a safe and warm retreat for your dog, protecting them from hypothermia and other cold-related illnesses.
Anúncios
Health Benefits of a Weatherproof Dog House
A properly insulated and waterproofed dog house significantly reduces the risk of your dog developing health problems associated with cold and damp conditions. It helps maintain a consistent temperature inside the dog house, preventing extreme temperature fluctuations that can be harmful.
Cost-Effectiveness of DIY Renovation
Embarking on a DIY renovation project to insulate and waterproof your dog house is not only beneficial for your dog’s well-being but also a cost-effective solution compared to purchasing a new, pre-insulated dog house. This allows you to customize the level of protection based on your specific climate and your dog’s needs.
- Keeps your dog warm and comfortable during winter.
- Prevents health issues related to cold and dampness.
- Offers a cost-effective solution for winterizing your dog’s shelter.
By taking the time to insulate and waterproof your dog house, you’re investing in your dog’s long-term health and happiness. This ensures they have a comfortable and safe space to retreat to, no matter how harsh the weather may be.
Planning Your DIY Dog House Renovation
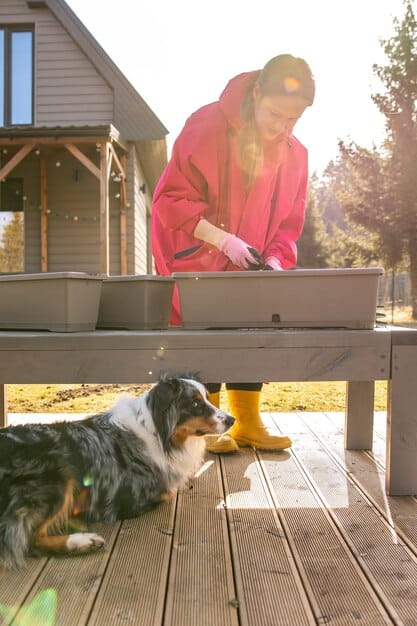
Before starting your DIY dog house renovation, careful planning is essential to ensure the project runs smoothly and efficiently. This involves assessing your current dog house, gathering the necessary materials, and creating a detailed plan of action.
A well-thought-out plan can save you time and money, preventing costly mistakes and ensuring the final result meets your expectations and provides optimum comfort for your dog. Start by evaluating the current state of your dog house and identifying areas that need improvement.
Assessing Your Current Dog House
Begin by thoroughly inspecting your dog house for any existing damage, such as cracks, leaks, or areas where the wood is rotting. Note any areas where air can easily enter, as these will need to be sealed during the renovation process. Also, measure the dimensions of the dog house to determine the amount of insulation and waterproofing materials you will need.
Gathering the Right Materials
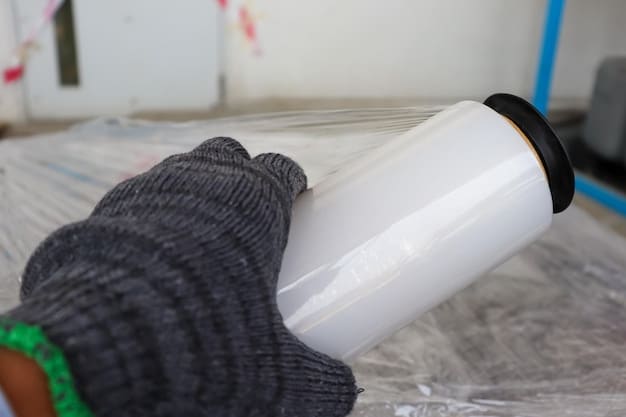
Selecting the right materials is crucial for the success of your insulation and waterproofing project. Ensure you have high-quality insulation, such as rigid foam or fiberglass, and effective waterproofing materials, such as sealant and waterproof paint. Consider purchasing pet-safe products to avoid any potential health hazards for your dog. Don’t forget tools like a staple gun, utility knife, measuring tape, and safety glasses.
Consider the climate in your region when choosing materials. If you live in an area with heavy snowfall or frequent rain, opt for more robust waterproofing solutions.
Planning ensures that your dog house is ready for winter, providing them with a secure and comfortable shelter.
Choosing the Right Insulation Materials
Selecting the appropriate insulation material is a key step in making your dog house winter-ready. There are several options available, each with its own advantages and disadvantages. Consider the R-value, ease of installation, and safety for your pet when making your decision.
The R-value measures the thermal resistance of the insulation material, with higher values indicating better insulation. Choose a material that provides adequate insulation for your local climate. Also, consider the ease with which you can work with the material, as some insulation types are more DIY-friendly than others.
Types of Insulation Materials
Common insulation materials include rigid foam, fiberglass batting, and reflective foil. Rigid foam is easy to cut and install, providing a good R-value, but it can be more expensive. Fiberglass batting is cost-effective but requires careful handling to avoid skin and respiratory irritation. Reflective foil can be used in conjunction with other insulation materials to add an extra layer of protection against heat loss.
Safety Considerations
Always prioritize your pet’s safety when selecting insulation materials. Avoid using materials that could be harmful if ingested or inhaled. Ensure that any insulation is adequately sealed to prevent your dog from accessing it. Some materials may emit odors or chemicals that could be irritating, so opt for pet-safe alternatives.
- Rigid foam: Easy to install, good R-value, but can be pricier.
- Fiberglass batting: Cost-effective but requires careful handling.
- Reflective foil: Adds an extra layer of protection against heat loss.
Consider these factors to ensure a safe and effective insulation solution for your dog.
Step-by-Step Guide to Insulating Your Dog House
Insulating your dog house can be a straightforward process if you follow a step-by-step guide. This involves preparing the dog house, cutting and fitting the insulation, and securing the insulation in place. Proper installation is essential to maximize the insulation’s effectiveness and ensure your dog’s comfort.
Start by thoroughly cleaning the interior of the dog house to remove any dirt, debris, or old bedding. This will provide a clean surface for the insulation to adhere to. Measure the interior dimensions of each wall, roof, and floor panel to determine the size of the insulation pieces you will need.
Preparing the Dog House
Before you begin, ensure the dog house is structurally sound. Repair any cracks or damage to the walls or roof to prevent air and moisture from entering. Seal any gaps around the door frame or other openings with caulk or sealant.
Cutting and Fitting the Insulation
Use a utility knife to cut the insulation material to the appropriate sizes. Ensure the pieces fit snugly against the interior surfaces of the dog house. For rigid foam, you can use construction adhesive or staples to secure the insulation in place. For fiberglass batting, you may need to create a framework to hold the insulation in position.
Correctly insulating your dog house is vital to ensure your furry companion has a cozy winter retreat.
Effective Waterproofing Techniques
Waterproofing is another crucial step in preparing your dog house for winter. Preventing water from entering the dog house helps to maintain a dry and comfortable environment for your dog. This involves sealing any gaps or cracks, applying waterproof paint or sealant, and ensuring proper drainage.
Start by inspecting the exterior of the dog house for any potential entry points for water, such as cracks in the walls or roof. Pay close attention to seams and joints, as these are common areas for leaks to occur. Seal any gaps with caulk or sealant, ensuring a watertight barrier.
Sealing Gaps and Cracks
Use a high-quality caulk or sealant to fill any gaps or cracks in the dog house’s exterior. Apply the sealant generously, ensuring it penetrates deep into the cracks. Smooth the sealant with your finger or a putty knife for a professional finish.
Applying Waterproof Paint or Sealant
Apply a waterproof paint or sealant to the exterior of the dog house. This will provide an additional layer of protection against rain and snow. Choose a paint or sealant that is specifically designed for outdoor use and is safe for pets. Apply multiple coats, following the manufacturer’s instructions.
Effectively waterproofing your dog house will help ensure your dog stays warm and dry all winter long.
Maintaining Your Winter-Proofed Dog House
Once your dog house is insulated and waterproofed, it’s important to maintain it properly to ensure its longevity and effectiveness. Regular maintenance can help prevent damage and prolong the lifespan of the insulation and waterproofing materials.
This involves regular inspections, cleaning, and making any necessary repairs. A well-maintained dog house provides a safe and comfortable shelter for your dog throughout the winter months.
Regular Inspections
Conduct routine inspections of your dog house, especially after heavy rain or snowfall. Look for any signs of leaks, cracks, or damage to the insulation or waterproofing materials. Address any issues promptly to prevent further damage.
Cleaning and Repairs
Clean the interior and exterior of the dog house regularly to remove any dirt, debris, or mold. Use a mild detergent and water to clean the surfaces, and allow them to dry thoroughly. Repair any cracks or damage to the insulation or waterproofing materials as soon as possible.
- Check for leaks after heavy rain or snow.
- Clean the interior and exterior regularly.
- Repair any damage promptly.
Proper maintenance will ensure your winter-proofed dog house continues to provide a safe and cozy shelter for your furry friend for years to come.
| Key Point | Brief Description |
|---|---|
| 🏠 Insulation | Keeps the dog house warm in winter. |
| 💧 Waterproofing | Prevents water from entering the dog house. |
| 🛠️ DIY | Cost-effective renovation. |
| 🐾 Maintenance | Regular cleaning and repairs ensure longevity. |
Retractable FAQ Section
▼
Insulation keeps the dog house warm in the winter by preventing heat loss. It also helps to keep the dog house cool in the summer by blocking external heat.
▼
Waterproof paint or sealant is most effective. Ensure the product is pet-safe and designed for outdoor use to protect against rain and snow.
▼
Inspect the dog house regularly, especially after heavy rain or snowfall, to check for leaks or damage to the insulation and waterproofing.
▼
It’s better to use pet-safe insulation materials. Some household insulation can be harmful if ingested or inhaled, so opt for safer alternatives.
▼
You’ll need a utility knife, measuring tape, staple gun, caulk, sealant, and safety glasses for insulating and waterproofing your dog house effectively.
Conclusion
In conclusion, taking on a DIY Dog House Renovation: Insulate and Waterproof Your Dog House for Winter 2025 project is a rewarding way to ensure your pet stays warm, dry, and comfortable during the cold winter months. Proper planning, using the right materials, and consistent maintenance are key to a successful and long-lasting result.


