DIY Pet Bowl Stand: Elevate Your Furry Friend’s Dining

Anúncios
Elevate your pet’s mealtime with a DIY pet bowl stand, a simple project that takes only two hours to complete and offers ergonomic benefits for your beloved companion.
Is your furry friend hunched over their food bowl, straining their neck during mealtime? A DIY pet bowl stand is the perfect solution! In just two hours, you can create a stylish and functional feeding station that elevates your pet’s dining experience, promoting better posture and digestion.
Anúncios
Why Build a DIY Pet Bowl Stand?
Creating a DIY pet bowl stand isn’t just a fun project; it’s an investment in your pet’s health and well-being. Elevated feeders offer numerous advantages, making mealtimes more comfortable and enjoyable for your furry companion.
Health and Comfort Benefits
Beyond aesthetics, a pet bowl stand contributes significantly to your pet’s physical health. Here’s why:
Anúncios
- Improved Posture: Elevated bowls reduce strain on your pet’s neck and joints, especially beneficial for older animals or those with arthritis.
- Better Digestion: Raising the food bowl can help prevent gulping and vomiting, aiding in smoother digestion and reducing the risk of bloat.
- Cleaner Eating Area: A stand keeps the bowls in place, minimizing spills and creating a tidier feeding area.
Investing a small amount of time and resources into building a DIY pet bowl stand can lead to significant improvements in your pet’s quality of life. It’s a simple way to show your love and care.
Planning Your DIY Pet Bowl Stand Project
Before diving into the project, careful planning is essential. This involves selecting the right materials, determining the appropriate height, and choosing a design that complements your home décor.
Choosing Your Materials
The materials you select will influence the stand’s durability and aesthetic appeal. Here are some popular options:
- Wood: A classic choice, offering versatility and a natural look. Pine, oak, and maple are all excellent options.
- Metal: Provides a sturdy and modern appearance. Consider steel or aluminum for a sleek design.
- Recycled Materials: Get creative by repurposing old furniture or using reclaimed wood for a unique, eco-friendly stand.
Always ensure that the materials you choose are non-toxic and safe for your pet. If using wood, seal it with a pet-safe sealant to prevent water damage and bacteria growth. By carefully considering these factors, you’ll set the stage for a successful and stylish DIY pet bowl stand.
Tools and Supplies You’ll Need
To ensure a smooth and efficient build, gather all necessary tools and supplies before starting your DIY pet bowl stand project.
Essential Tools
Having the right tools on hand will make the process much easier and more enjoyable.
- Measuring Tape: For precise measurements to ensure the stand is the correct height.
- Saw: For cutting the wood or metal to the desired dimensions. A circular saw or jigsaw works well for wood, while a metal-cutting saw is needed for metal.
- Drill: To create pilot holes and attach screws or bolts.
Necessary Supplies
Make sure to have these supplies ready to go before starting your DIY pet bowl stand:
- Wood or Metal: Depending on your chosen material, purchase the appropriate amount.
- Screws or Bolts: To securely assemble the stand. Choose the appropriate length and type for your materials.
- Pet Bowls: Stainless steel or ceramic bowls that fit comfortably in the stand. Measure the diameter of the bowls to ensure a snug fit.
- Sandpaper: To smooth out rough edges.
Step-by-Step Guide to Building Your Pet Bowl Stand
Ready to get started? Follow this step-by-step guide to create a functional and stylish DIY pet bowl stand that your pet will love.
Step 1: Measure and Cut the Materials
Begin by measuring the desired height of the stand. This will vary depending on your pet’s size. Measure your standing pet from floor to chest, in order to calculate the appropriate height.
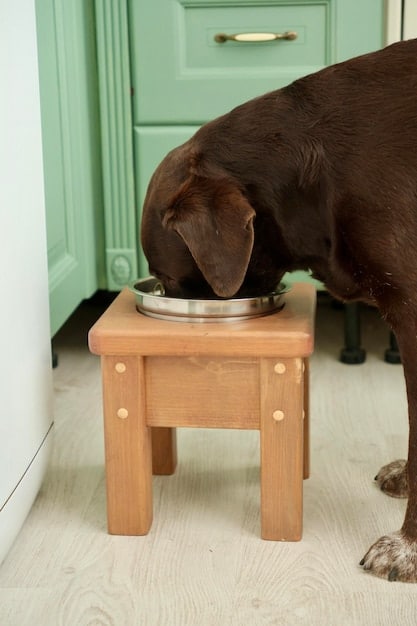
Step 2: Assemble the Stand
Now, using screws or bolts, assemble the pieces to form the frame of the stand. Ensure that all joints are secure and that the stand is stable, test the feeder before letting your pooch go to town on some food!
Step 3: Add Finishing Touches
Sand any rough edges and apply a pet-safe sealant to protect the wood from moisture. Add decorative elements, such as paint or stain, to match your home décor.
Customizing Your DIY Pet Bowl Stand
One of the best things about a DIY pet bowl stand is the ability to customize it to perfectly suit your pet and your home décor.
Personalizing the Design
Consider adding decorative elements like paint, stain, or stencils to match your interior design. You can also incorporate your pet’s name or a fun pattern.
- Paint: Choose a non-toxic paint in your favorite color. Multiple coats of paint are ideal.
- Stain: Use a wood stain to enhance the natural grain of the wood, giving it a rich and warm tone.
- Stencils: Add a playful touch.
Customizing the look and feel of your DIY pet bowl stand is all about expressing your creativity and making something unique for your beloved pet. By incorporating these ideas, you’ll create a functional and beautiful piece that both you and your furry friend will appreciate.
Ensuring Safety and Durability
Safety and durability are paramount when building a DIY pet bowl stand. Taking the time to ensure your creation is both sturdy and safe for your pet will provide peace of mind and a long-lasting feeding station. Ensure that there are no sharp exposed edges, and that the materials you are using aren’t toxic.
Sturdy Construction Techniques
Use strong joinery techniques to securely fasten the stand’s components. Screws or bolts, combined with wood glue, will provide a robust and stable structure.
- Reinforced Joints: Add corner braces to reinforce joints, and prevent wobbling
- Stable Base: Ensure the base is wide enough to prevent tipping. A wider base will add stability, especially for larger pets.
- Quality Materials: Choose sturdy and durable materials that can withstand daily use and resist wear and tear.
By prioritizing safety and durability, you can create a DIY pet bowl stand that not only enhances your pet’s dining experience but also provides a reliable and long-lasting feeding solution.
| Key Point | Brief Description |
|---|---|
| 💪 Health Benefits | Improves posture and digestion for your pet. |
| 🛠️ DIY Project | Customizable and easy to build in just two hours. |
| 🎨 Personalization | Match your home decor with paint, stain, or stencils. |
| 🛡️ Safety First | Ensure stability and use non-toxic materials. |
[Título da seção FAQ em en-US]
▼
The ideal height usually corresponds to the height of your pet’s chest. Measuring from the floor to your furry friend’s chest provides the perfect height for your DIY pet bowl stand.
▼
Safe materials include wood with a pet-safe sealant, stainless steel, and food-grade plastic. Ensure all materials are non-toxic and easy to clean.
▼
Use a wide base for stability, add weights to the bottom, and ensure the stand is placed on a level surface. These adjustments can create a safer & sturdier design.
▼
Yes, elevated bowls can help prevent gulping and vomiting, aiding in smoother digestion and reducing the risk of bloat. This is a great solution when constructing your new pet feeder!
▼
Wipe the stand regularly with a damp cloth and mild soap. Ensure the wood is properly sealed to prevent moisture damage. You may also use pet-safe wipes and disinfectants!
Conclusion
Building a DIY pet bowl stand is a rewarding project that benefits both you and your furry companion by providing a more comfortable and ergonomic dining experience. With careful planning, quality materials, and a bit of creativity, you can create a stylish and functional feeding station that enhances your pet’s health and happiness.


