Make Your Own Catnip Toys: Simple Sewing Projects for Feline Fun
Anúncios
Make your own catnip toys using simple sewing projects to provide your feline friend with endless fun and engagement, enhancing their playtime with safe and stimulating handmade toys.
Looking for a fun and inexpensive way to entertain your feline friend? Why not make your own catnip toys: simple sewing projects for feline fun are a great way to provide your cat with stimulating playthings crafted with love and care.
Anúncios
Why Make Your Own Catnip Toys?
Creating your own catnip toys is not only a rewarding DIY project but also a fantastic way to ensure your pet’s playtime is both safe and engaging. Store-bought toys can sometimes contain materials that are harmful if ingested, making homemade alternatives a safer choice.
Plus, crafting these toys allows you to tailor them to your cat’s specific preferences, ensuring they receive the most enjoyment possible.
Anúncios
Health and Safety Considerations
When making catnip toys, prioritize your cat’s health and safety by choosing non-toxic materials. Avoid small parts that could be swallowed and opt for durable fabrics that won’t easily tear.
Always supervise your cat during playtime, especially when introducing a new toy, to ensure they don’t ingest any stuffing or small components.
Cost-Effectiveness
DIY catnip toys are an economical option compared to their store-bought counterparts. By using scraps of fabric, recycled materials, and bulk catnip, you can create a variety of toys without breaking the bank.
- Reuse old clothing or fabric remnants.
- Buy catnip in bulk to save money.
- Repurpose household items like cardboard boxes for added fun.
Making your own catnip toys offers numerous benefits, from ensuring your cat’s safety to saving money. By choosing the right materials and following simple sewing techniques, you can create durable, engaging, and personalized playthings that your feline friend will adore.
Essential Materials for Catnip Toy Making
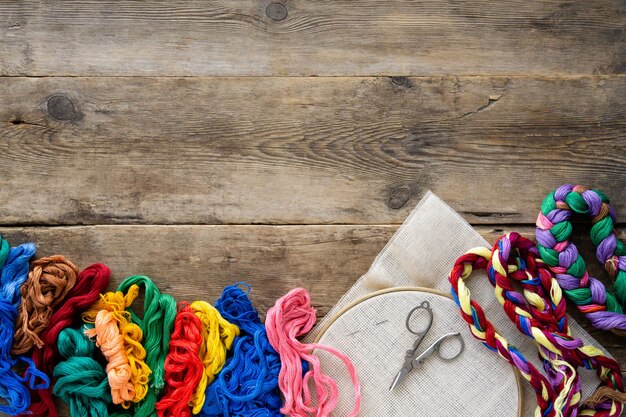
Before diving into your sewing projects, it’s crucial to gather the right materials. Having everything on hand will make the crafting process smoother and more enjoyable.
Here’s a comprehensive list of essential items you’ll need to get started.
Fabric Choices
Selecting the right fabric is vital for creating durable and safe catnip toys. Opt for materials that are sturdy, non-toxic, and easy to clean.
Consider using cotton, felt, or fleece, as these fabrics are gentle on your cat’s paws and can withstand a fair amount of chewing and scratching.
Catnip Selection
The quality of catnip can significantly impact your cat’s interest in the toy. Choose organic catnip to avoid any harmful chemicals and ensure a potent, enticing aroma.
- Use dried catnip for its long-lasting scent.
- Store catnip in an airtight container to maintain freshness.
- Consider growing your own catnip for a sustainable supply.
Sewing Supplies
Having the right sewing tools will make your projects easier and more precise. Essential supplies include needles, thread, scissors, and possibly a sewing machine for larger projects.
- Invest in a good pair of fabric scissors for clean cuts.
- Use strong thread to prevent seams from unraveling.
- A sewing machine can speed up the process for more intricate designs.
Gathering the essential materials for catnip toy making ensures that you have everything you need to create safe, durable, and engaging toys for your feline companion. By selecting the right fabrics, high-quality catnip, and reliable sewing supplies, you set the stage for a fun and successful DIY project.
Simple Sewing Techniques for Beginners
If you’re new to sewing, don’t worry! Creating catnip toys can be a fun and easy way to learn basic sewing techniques. Start with simple projects and gradually increase complexity as you gain confidence.
Here are a few fundamental sewing skills that will come in handy when making catnip toys.
Basic Stitches
Mastering basic stitches is essential for any sewing project. The running stitch, back stitch, and blanket stitch are particularly useful for creating catnip toys.
Practice these stitches on scrap fabric before applying them to your actual toy designs. Consistent stitch length and tension will result in stronger and more durable seams.
Cutting and Tracing Patterns
Accurate cutting and tracing are crucial for achieving the desired shape and size of your catnip toys. Use paper or cardboard to create templates and trace them onto your fabric.
Always cut along the traced lines carefully to ensure the pieces fit together properly during sewing.
Stuffing Techniques
The way you stuff your catnip toys can affect their shape and durability. Use small amounts of stuffing at a time, and distribute it evenly throughout the toy.
- Avoid overstuffing, as this can make the toy too hard and uncomfortable for your cat.
- Use a tool like a chopstick or pencil to reach small corners and ensure even distribution.
- Mix catnip with the stuffing for added appeal.
Learning simple sewing techniques empowers you to create a variety of catnip toys with confidence. By mastering basic stitches, practicing accurate cutting and tracing, and perfecting your stuffing techniques, you can design durable, engaging, and personalized playthings for your feline friend.
Project 1: The Classic Catnip Mouse
The classic catnip mouse is a timeless toy that cats adore. This project is perfect for beginners and requires minimal materials and sewing skills. Let’s dive into creating this simple yet engaging toy.
Here’s a step-by-step guide to crafting your own catnip mouse.
Materials Needed
To get started, gather the following materials: a piece of felt or cotton fabric, catnip, stuffing (such as cotton balls or fiberfill), thread, a needle, scissors, and a pen or marker.
Ensure that all materials are non-toxic and safe for your cat to play with.
Step-by-Step Instructions
Begin by drawing a mouse shape on a piece of paper. Cut out the template and trace it onto your fabric. Cut out two identical fabric pieces.
Sew the two pieces together, leaving a small opening for stuffing. Turn the mouse right-side out, stuff it with a mixture of catnip and stuffing, and stitch the opening closed. Add a tail using a piece of yarn or fabric scrap.
Customization Ideas
Get creative with your catnip mouse by adding different colors, patterns, or embellishments. Consider using contrasting thread for a decorative touch, or adding small beads for eyes (ensure they are securely attached).
- Use different fabric textures for added sensory stimulation.
- Add a bell inside for extra auditory engagement.
- Create a variety of mice in different sizes and colors to keep your cat entertained.
Crafting a classic catnip mouse is a straightforward and rewarding project that your cat will undoubtedly enjoy. By following these simple steps and adding your own creative touches, you can provide your feline friend with hours of playful fun.
Project 2: The Crinkly Catnip Kicker
The crinkly catnip kicker is designed to engage your cat’s natural kicking and grasping instincts. The added crinkly sound makes playtime even more exciting. This project is slightly more advanced but still manageable for beginner sewers.
Here’s how you can make a crinkly catnip kicker for your feline companion.
Materials Needed
Gather your materials: a piece of durable fabric (such as denim or canvas), crinkle material (like cellophane or mylar), catnip, stuffing, thread, a needle, scissors, and a sewing machine (optional).
Ensure the crinkle material is safe and won’t shatter into sharp pieces if torn.
Step-by-Step Instructions
Cut two rectangular pieces of fabric to your desired kicker size. Place a layer of crinkle material between the two fabric pieces. Sew around the edges, leaving a small opening.
Stuff the kicker with a mixture of catnip and stuffing, then stitch the opening closed securely. Reinforce the seams to withstand your cat’s kicking and biting.
Adding Extra Features
Enhance your crinkly catnip kicker by adding extra features that will capture your cat’s attention. Consider attaching ribbons, feathers, or small toys to the ends of the kicker.
Experiment with different crinkle materials to create various sounds. Ensure all additions are securely attached to prevent ingestion.
Creating a crinkly catnip kicker is a fun and engaging project that will provide your cat with hours of entertainment. By following these instructions and adding your own creative touches, you can design a durable and exciting toy that caters to your cat’s natural instincts.
Tips for Keeping Your Catnip Toys Fresh and Engaging
To ensure your homemade catnip toys remain appealing to your cat, it’s essential to keep them fresh and engaging. Over time, the scent of catnip can fade, and toys can become worn or dirty.
Here are some useful tips for maintaining your catnip toys and keeping your feline friend interested.
Refreshing Catnip
To revive the scent of catnip in your toys, gently rub or knead the toy to release the trapped aroma. Alternatively, you can sprinkle a small amount of fresh catnip onto the toy.
- Store catnip toys in an airtight container when not in use to preserve the scent.
- Consider spraying the toys with catnip spray for an instant boost.
Cleaning and Maintenance
Regular cleaning helps to remove dirt and odors from your catnip toys, keeping them hygienic and appealing. Hand wash the toys with mild soap and water, and allow them to air dry completely.
Inspect the toys regularly for any signs of damage, such as loose seams or tears, and repair them promptly to prevent ingestion of stuffing or small parts.
Rotation Strategies
Rotating your cat’s toys can prevent boredom and maintain their interest. Keep a selection of toys on hand and switch them out every few days or weeks.
This strategy keeps playtime fresh and exciting and prevents your cat from becoming desensitized to the toys.
By following these tips for refreshing catnip, maintaining cleanliness, and implementing rotation strategies, you can ensure that your homemade catnip toys remain engaging and appealing to your feline friend for a long time. These practices not only extend the lifespan of the toys but also enhance your cat’s overall playtime experience.
| Key Point | Brief Description |
|---|---|
| 🌿 Safe Materials | Use non-toxic fabrics and catnip. |
| 🧵 Basic Sewing | Master simple stitches and patterns. |
| 🔄 Toy Rotation | Keep your cat engaged with fresh toys. |
| 🧺 Cleaning | Regularly wash and inspect for damage. |
FAQ
▼
Durable, non-toxic fabrics like cotton, felt, and fleece are excellent choices. They are gentle on your cat’s paws and can withstand chewing and scratching.
▼
Rub or knead the toy to release the aroma, sprinkle fresh catnip on it, or use a catnip spray. Store toys in an airtight container when not in use.
▼
Wash cat toys regularly with mild soap and water, allowing them to air dry completely. This keeps them hygienic and appealing for your cat.
▼
Yes, if made with non-toxic materials and checked regularly for damage. Avoid small parts and supervise your cat during playtime to ensure they don’t ingest anything harmful.
▼
Add crinkle material, different textures, or small bells for extra sensory stimulation. Rotate toys to prevent boredom and maintain your cat’s interest.
Conclusion
Creating your own catnip toys through simple sewing projects is a rewarding way to bond with your feline friend while providing them with safe, engaging, and personalized playthings. By following these tips and techniques, you can ensure your cat enjoys endless hours of fun with their handmade toys.


